Receiving data from third-party services in bot using Incoming Webhook
Incoming webhook allows you to launch a bot scenario for a specific contact from an external service and pass parameters to it.
How to Create Incoming Webhook in Chat Bot
To create a webhook, you need to perform the following actions:
Create a scenario in the "Scenarios" section that will be called using the webhook
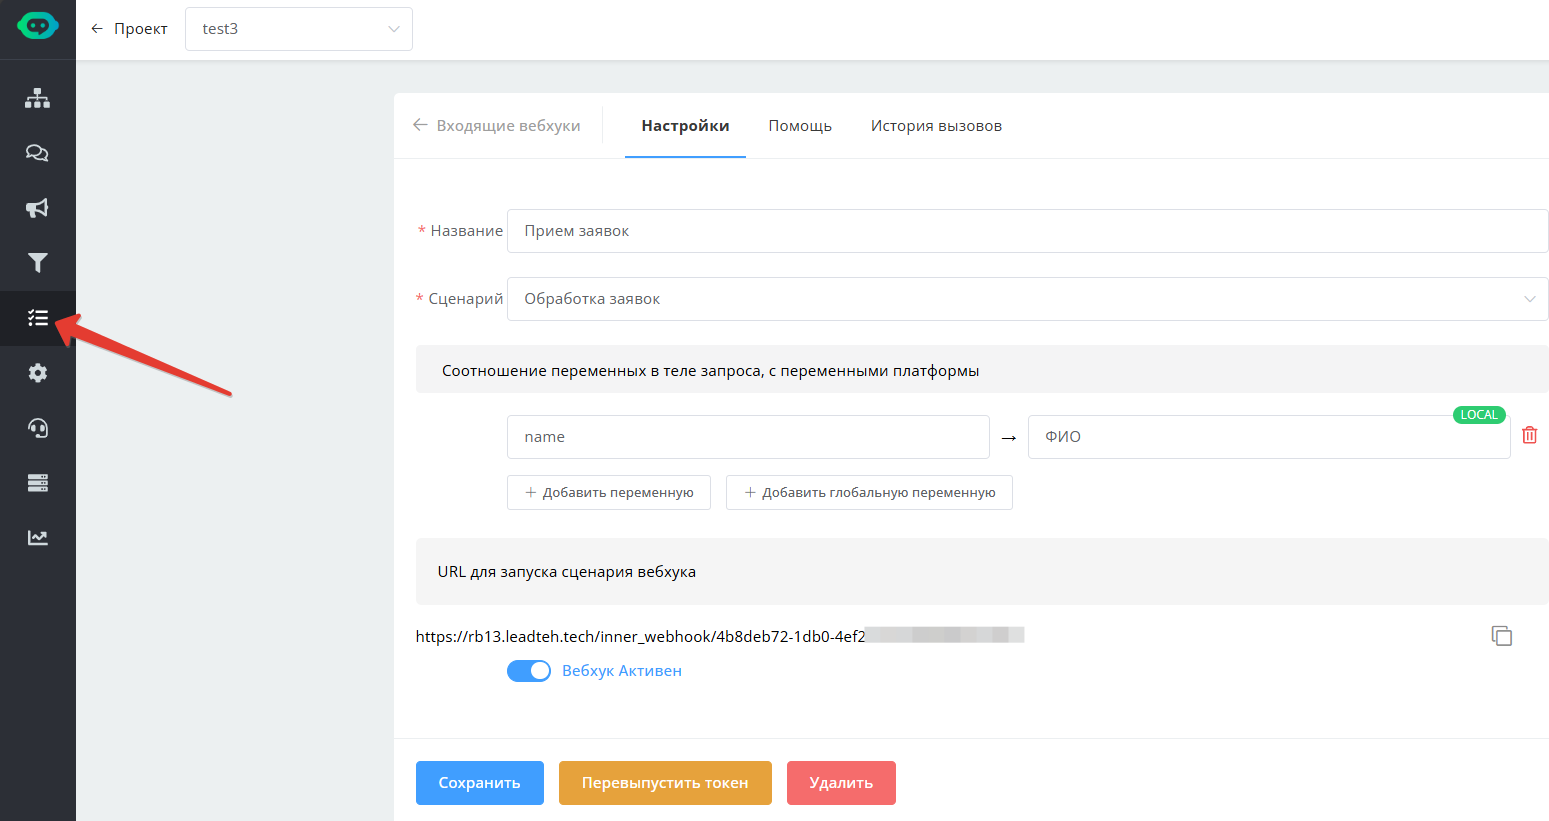
Create a webhook in the "Incoming Webhooks" section
Select webhook type:
Standard webhook — webhook for which mapping of received variables with bot variables is configured
Javascript webhook — webhook in which the received request is parsed using custom javascript code.
Webhook type selection
4. Specify an arbitrary name 5. Select the required scenario
Standard Webhook
To configure a standard webhook, you need to configure the mapping of variables passed in the request body with bot variables that will be written when the webhook is called. All variables in the webhook request body must be passed inside the variables variable. If the bot does not yet have a variable with the given name, it will be created.
Javascript Webhook
In the input field, paste the code to process the received request.
Received request fields:
var rawBody = response.body; // Raw request body
var data = response.data; // Object of all request variables, including query string, form, body, etc.
For correct script execution, you need to:
Set the contact for which the JavaScript code will be executed
setContactByTelegramId(<telegram contact id>) //sets the current contact by id from telegram
setContactById(<Leadtex contact id>) – sets the current contact by Leadtex contact id
In the incoming webhook javascript interpreter, the functions are not available: goToBlock() and disableContinue().
Webhook Call
After creating the webhook, a unique URL will be generated to launch the previously selected scenario.
To call the webhook, you can use both POST and GET requests, variables will be read regardless of how they were passed: in the address or in the request body.
When calling the webhook URL, you must meet the following conditions:
Request header (HTTP Headers) Accept must have the value "application/json"
The request variables must contain the contact search indicator variable contact_by with any value from the list below and the search variable with the value by which the contact needs to be found:
id - search for contact by its identifier in the Leadteh system,
phone - search by phone number,
email - search by E-mail,
telegram_name - search by Telegram account name,
telegram_id - search by numeric Telegram identifier,
whatsapp - search by Whatsapp number,
vk - search by Vk identifier,
amocrm_id - search by identifier in AmoCRM system,
bitrix24_id - search by identifier in Bitrix24 system
.png)